Best 11 techniques to preserve your favorite food
As a gastroenterologist, I deal with a lot of patients that have been exposed to food poisoning.
Needless to say, it is not the nicest thing to be exposed to.
Food poisoning is when the food is contaminated by different bacteria, which causes abdominal pain.
Mostly, this bacteria grows and develops in the food because—well—they have a nurtured environment with oxygen, carbon, water, and nitrogen content.
Bacteria growth on foods is accompanied by the foods not being preserved.
As preservation arrests the growth and development of the bacteria by widely slowing down the rate of nutrients taken by the bacteria from the food.
Ultimately, the bacteria’s disease-causing activities slow down; in some cases, the bacteria die.
Safe to say,
Not all foods require that you preserve them; only the not-too acidic ones like:
- Poultry (Skinless Chicken).
- Most Vegetables.
- Most Fruits.
- Yogurt.
- Milk.
But,
The acidic foods like:
- Lemon.
- Orange.
- Cheese.
- Fish.
…don’t need to be preserved as much as the not acidic ones do.
Now, for the million-dollar question, “What are the best techniques I can preserve my food by?”
My answer will be:
Now for the…
1. The Basic Easy Way
When it comes to preserving food, some techniques require time and effort.
But also,
There is the basic easy one that requires minimal processing for storage, where you preserve your foods either in your kitchen, root cellar, or in the refrigerator (cool storage).
This is the easiest, time-free home food preserving technique.
Be aware though!
If you will preserve your foods in a root cellar, the root cellar has to be:
- Damp.
- Cool (An ideal cellar temperature ranges from 32 to 45 degrees Fahrenheit).
So, what are the advantages of this technique?
For the root cellar storage:
- The soil underground keeps the temperature in the cellar above the freezing point.
- The humid atmosphere prevents the vegetables, and fruits, from losing water and becoming spoiled.
For the refrigerator storage:
- Slowing the bacterial growth on foods. Thus, no more illness.
Now for the foods that can be preserved in a root cellar storage:
- Carrots
- Onions
- Cabbage
- Apples
- Potatoes
- Beets
- Garlic
- Rutabagas
- Parsnips
- More…
For the foods that should be preserved in a refrigerator (Or freezer):
- Meat.
- Fish.
- Poultry.
Here are some crops that only need minimal processing for storage:
- Dry Corn.
- Pumpkins.
- Shell beans.
- Squash.
- Root vegetables.
2. The Drying (Dehydrating) Way
Drying, or dehydrating, inhibits the bacteria from further growing and developing on the food.
This is by removing enough moisture so that the bacteria, such as yeasts and molds can’t grow.
But, how can you dry the foods?
Simply, by using:
- Baking Sheets, and into the oven.
- Sun ovens.
- Solar Dehydrators.
- Commercial Dehydrators, like the Excalibur (And no! Not the sword 😊)
- Air Drying.
I would recommend that you turn to solar power often while drying food.
And my recommendation is based on the fact that sun-drying ensures the continuity and maintenance of the natural flavors in the food.
And, for foods that dehydrate well (maintaining their natural tasty flavors):
- Meat.
- Vegetables.
- Legumes
- Spices.
- Fish.
- Fruits.
3. The Canning Technique
Canning is one of the oldest safe methods of food preservation.
Simply put,
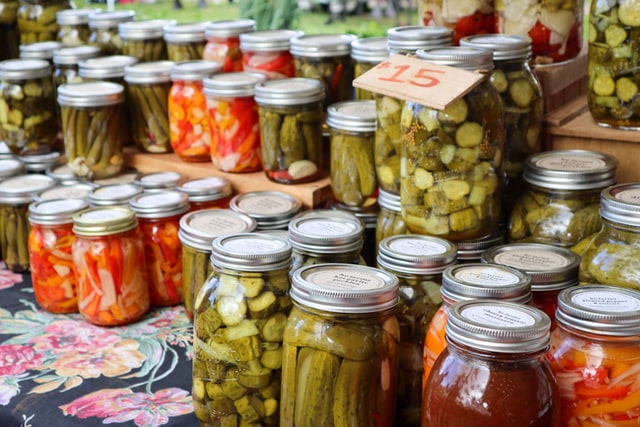
Canning is placing food inside a jar, closing the lid, and then heating the jar.
This process kills microorganisms that can be hazardous to people when ingested.
What makes canning an effective preservation method?
Well,
Canning alters:
- The salinity levels of food.
- The PH levels.
- The moisture.
When these changes take place in the foods, they become more immune to microbes, bacteria, mold, and yeast.
All of these alterations, when accompanied by physical barriers like cans, or jars, resulting in protection against decay.
Which will prevent the foods from ever having any type of microorganisms that can harm humans when ingested.
Specifically speaking, there are three types of canning preservation: Water Bath Canning, Steam Canning, and Pressure Canning.
For the…
Water Bath Canning
Water bath canning involves a kettle or a stockpot with a lid on top of it.
Be aware though that the jars shouldn’t be in direct contact with the bottom of the pot.
Instead use a canning rack, covered with not less than 2 inches of water.
The water bath canning is used to preserve high acid foods with a pH of 4.6 or lower including:
- Jams
- Tomatoes (With acids added.
- Pickles and relishes.
- Chutneys.
- Salsa.
And, for the…
Steam Canning
Steam canning is a home canning method where the food is in an enclosed pot and being processed by the heat of steam.
The temperature of steam inside the pot can reach 212 F (100 C), which has the same sterilizing effect as boiled water. Which kills microbes and prevents food decay.
Steam Canning is suitable for high acids foods.
In comparison with water bath canning, steam canning saves:
- Energy.
- Time
- Money (less Water bill)
In the words of Linda Ziedrich, the respected home canning author:
“Steam canners save water, energy, and time, and they don’t boil over.”
Pressure Canning
The pressure canning technique can only take place in a pressure canner.
These pressure canners process the food under a high temperature and high-pressure steam.
This technique is preferable among others because it maintains the flavor of the ingredients while they are canned, in addition to its less usage of water and energy than the water bath canning technique.
So,
How can you use this technique to preserve your meat, veggies, and more?
The answer will be in steps:
1. Heat the Jars.
Add 2 to 3 inches of water into the canner, and heat it to 180 F.
2. Fill the hot jars with the food you mean to preserve. Don’t fill a cool jar.
3. Remove the air bubbles from the jars, either using a spatula or a fork.
We remove the extra air bubbles because they can hinder the jar’s process of developing a good seal. Which will impair the processing of the foods, failing food preservation.
4. Add Lid after you wipe the rim of the jars.
5. Lock the lid.
6. Increase the heat. And for 10 minutes, allow the canner to vent.
7. Set the timer specified for your recipe.
8. When the timer is up, turn off the heat, but do not open the lid.
Wait till the safety valve drops back down; this shows that the canner is safe to open and no longer pressurized.
Now,
It is important to note that pressure canning can only be used for low acid foods like:
- Carrots
- Sauces
- Corn
- Beans
- Soups
- Meats
- Broth
4. The Smoking Technique
Smoking is one of the oldest food preservation techniques.
It has been around slightly after cooking with fire was a major discovery.
Imagine how old?
Smoking food processing for preservation is simply the exposure of fish products and cured meat to smoke to:
- Preserve them.
- Add flavor.
- Lay that enticing rich brown color.
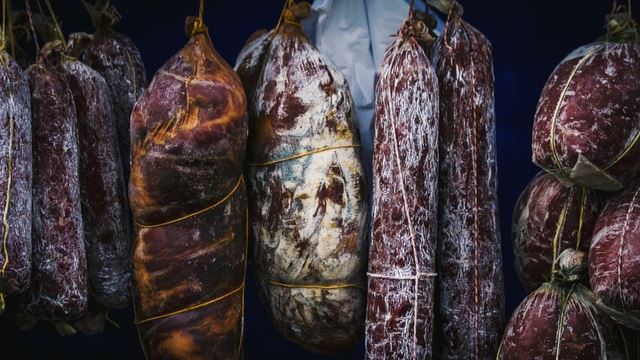
Whether implemented at home or for commercial use, the smoking technique involves hanging the meat on racks in a room designed to contain the smoke, so that it can be dried.
The time range a lump of meat should be hanged and exposed to smoke for preservation varies; the periods vary from as short as few hours to as long as several days.
The drying that takes place by the smoke preserves the meat.
This is because there are different chemicals in the wood, like formaldehyde and other alcohols, that act as natural preservatives.
But be aware that not all types of wood can be used to burn for food preservation.
You must use hardwood fire.
Why?
This is because the sticky pitch included in the pine, a softwood of conifers, produces a film on the meat that imparts a bitter and sour taste on the meat.
This method of food preservation is suitable to:
- Meat.
- Cheeses.
- Nuts and seeds.
- Hard-boiled eggs.
- Berries.
- Heart, tongue, and liver of cattle.
5. The Freezing Technique
The freezing technique is perfect for beginners. This is because you only have to do two simple things with little to no specialized equipment:
- Blanching/Cooking. To slow the enzymatic actions in the food and ensure that the food won’t go stale.
- Just put it in the freezer.
Simple, right?
But wait, what is blanching?
Blanching is simply treating the veggies with heat, then immersing these veggies in cold water to block the cooking process.
Blanching time differs from one vegetable to another, but it is always easy to find these blanching periods time.
The most common blanching time amongst all vegetables is 3 minutes, but still, feel free to check other vegetables blanching durations.
For the second step, it is better to store the veggies with antioxidants or sugars, to prolong their storage life and slow down the discoloration.
Here is a good tip I learned from experience:
At first, I followed the instructions carefully and to the word. But, I felt that the storage life was rather shorter than I anticipated.
Then, I came across the vacuum seal bags.
I found that sealing the frozen produce in these vacuum seal bags help:
- Triple or even quintuple the storage life of the frozen foods.
- Prevents ice crystal formation. Which prevents the leakage of intracellular fluid from the food which can take place if the ice crystals grow too much and punctured the cell membrane.
Now for the foods that can be preserved using the technique:
- Cheese
- Veggies
- Fruits
6. The Lyophilization Way
Or in other words: Freeze Drying
Freeze-drying, or lyophilization, is a water removal process.
The main objective of it is to extend the shelf life of perishable materials, like food, or prepare it for transportation.
Simply put, freeze-drying is implemented in three different steps:
- Freezing.
- Sublimation.
- Desorption.
Let’s dissect these steps a little more, shall we?
Firstly, the freezing step.
As we have discussed before, freezing slows down the enzymatic actions in the foods, preventing them from going stale.
Or to put it in simpler terms, freezing the food avoids changes in the dried product’s physical appearance, molecular characteristics, and flavor maintenance.
Secondly, the Sublimation Step.
Sublimation is simply reducing pressure, then treating the material with enough heat so that the frozen water in the material can directly vaporize.
But, only 95% of the water vaporizes in this step. 5% more to go.
Thirdly and finally, the Desorption step.
This is the phase where the final 5% water within the molecules is removed, and the food is now ready to be stored for a long time without any flavors lost.
How to do it at home?
Well, you will need a Home Freeze Dryer, and then follow the next steps:
- Get a heavy-duty freezer.
- Pair the heavy-duty freezer with an utterly airtight chamber capable of holding a vacuum every time you use it.
- Correlate it with a freakishly strong vacuum pump.
- Repeat the sublimation process for a time range from 30 minutes to 2 hours.
- Use a humidity sensor to check if all the water is out, which will imply the end of the cycle.
Now for the foods suitable for freeze-drying:
- Dairy Products.
- Cream-based soups.
- Leftovers.
- Fish and Seafood.
- Fruit and juice.
7. Fermentation Technique
The fermentation technique is one great way to ensure your foods stay fresh all year round.
Fermentation extends the storage life of foods. This is achieved by converting sugars and other carbohydrates into preservative organic acids and carbon dioxide.
This conversion to organic acids was proven to preserve and flavor dairy products and vegetables.
Now to how to preserve your fruits by fermentation in steps:
- Get your fermentation equipment (Fermenting Crock, Clean Glass bowl, or Glass Mason jar).
- Get your vegetables ready for fermentation through the grating, slicing, or chopping.
- Use salt (preferably sea salt), whey, or a starter culture (microbial structures used in fermentation, for those of you who don’t know).
- Submerge your vegetables under brine in an anaerobic environment. Seal the lid if you are using a Glass Mason Jar).
- Leave your veggies at room temperature and give them some time to ferment. Then put it in the freezer.
8. Preservation in Salt and Sugar
Food preservation in salt in sugar was around since before freezing, modern canning, and dehydrating.
Salts and sugars draw the water from the foods, preventing the microorganisms from growth and development in the food.
Here is a thing to consider, preserving foods in salt and sugar can drastically change their texture and flavor.
So, if you are with adventurous palates, this food preservation method is for you.
Now,
Foods suitable for preservation in salt or sugar:
- Fruits
9. Vinegar Pickling
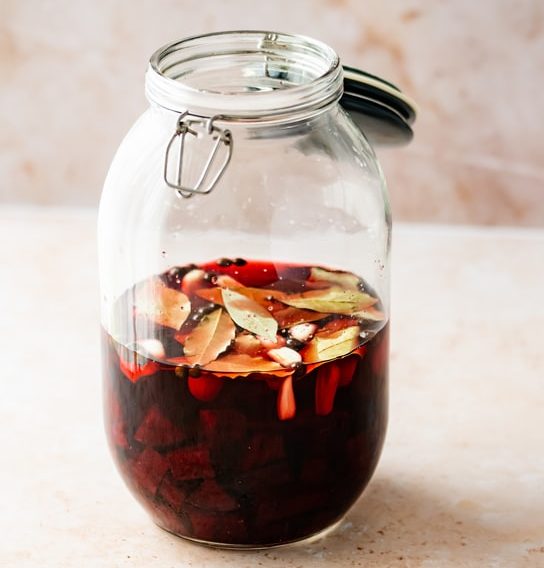
You simply put your foods in vinegar.
Vinegar is highly acidic, which makes it impossible for microorganisms to survive in this highly acidic environment.
Foods that can be preserved using vinegar:
- Apples.
- Cucumbers.
- Cauliflower.
- Onions.
- Green Beans.
10. Immersion in Olive Oil
This technique is special because it blocks the air away from the food.
And as bacteria need air to survive, they die, and ultimately the food is preserved.
This food preservation method is known in some parts of Europe, the only problem is that it’s not safe for beginners at food preservation.
The reason is that low acid vegetables when treated in the wrong way, result in a serious botulism risk.
Now,
This food preservation method is suitable for:
- Meat products.
- Fish.
- Cheese.
- Herbs.
11. Pasteurization
Pasteurization is the heat treatment of food to:
- Destroy disease-producing organisms.
- To inactive the enzymes that make the food go stale.
The amount of heat used in the pasteurization causes minimal changes to the flavor and nutritional aspects of the food compared to the intense amount of heat used in sterilization.
This food preservation technique has many advantages on the food including:
- Disease prevention by effectively killing pathogenic micro-organisms.
- Improvements in the scent and flavor of the food.
- Prolongs the shelf-life of food.
And many more…
Unfortunately, the only food you can home preserve by pasteurization is milk.
How?
Three steps (For one gallon of Milk; 3.8 liters):
- Raise the temperature to 145 F (63C)
- Keep the milk at, or slightly above, this temperature for 30 minutes. If the temperature dropped lower than 145, restart another timer for 30 minutes.
- After the timer goes off, remove the milk from heat.
For foods that are suitable for pasteurization as a means of preservation:
- Fruits
- Vegetables
- Milk
There are different types of pasteurization. Each of which has its food category which it can preserve efficiently.
But this will be an upcoming article.
Conclusion
In conclusion, you have 11 techniques that you can preserve your food by:
- The Basic Easy Way.
- The Drying (Dehydrating) Way.
- The Canning Way.
- The Smoking Way. (Yeah I was skeptical too!)
- The Freezing Way.
- The Lyophilization Way. (Wait What?)
- The Fermentation Way.
- Preservation in Salt and Sugar.
- Vinegar Pickling.
- Immersion in Olive Oil.
- Pasteurization.
Each technique is suitable for one or two categories of foods.
Make sure you preserve the right food, using the right technique, or you will be poisoned.
Stay Safe!

